Create a Draggable Paragraph in HTML5

Create a Draggable Paragraph in HTML5

Creating draggable elements in HTML5 can enhance the interactivity of your web pages. This feature can be particularly useful for building dynamic user interfaces where elements can be repositioned according to user preferences. In this article, we will explore how to create a draggable paragraph in HTML5 using both native HTML5 drag-and-drop API and additional JavaScript for more complex behaviors.

Introduction to HTML5 Drag and Drop API

HTML5 introduced a native API for drag-and-drop functionality, which simplifies the process of making elements draggable and droppable. This API involves setting draggable attributes, handling drag events, and defining drop zones.

Example 1: Basic Draggable Paragraph

Here’s a simple example of making a paragraph draggable using the HTML5 draggable attribute:

<!DOCTYPE html>
<html lang="en">
<head>
<meta charset="UTF-8">
<title>Draggable Paragraph Example</title>
<style>
    p {
        width: 200px;
        padding: 10px;
        border: 1px solid #000;
        background-color: #f4f4f4;
    }
</style>
</head>
<body>
<p draggable="true" id="drag1">Visit how2html.com for more examples!</p>
<script>
    document.getElementById('drag1').addEventListener('dragstart', function(event) {
        event.dataTransfer.setData('text', event.target.id);
    });
</script>
</body>
</html>

Output:

Create a Draggable Paragraph in HTML5

In this example, the paragraph is made draggable by setting the draggable="true" attribute. The dragstart event is handled to set the data type and the value that will be transmitted if the element is dropped into a drop zone.

Example 2: Custom Drag Image

You can customize the image that appears when an element is being dragged:

<!DOCTYPE html>
<html lang="en">
<head>
<meta charset="UTF-8">
<title>Custom Drag Image Example</title>
<style>
    p {
        width: 200px;
        padding: 10px;
        border: 1px solid #000;
        background-color: #f4f4f4;
    }
</style>
</head>
<body>
<p draggable="true" id="drag2">Learn more at how2html.com!</p>
<script>
    document.getElementById('drag2').addEventListener('dragstart', function(event) {
        var img = new Image();
        img.src = 'https://example.com/drag-icon.png';
        event.dataTransfer.setDragImage(img, 10, 10);
        event.dataTransfer.setData('text/plain', event.target.id);
    });
</script>
</body>
</html>

Output:

Create a Draggable Paragraph in HTML5

This example sets a custom drag image that will appear during the drag operation. The setDragImage method is used to define the image and its offset position.

Example 3: Restricting Drop Zones

To define where draggable elements can be dropped, you can specify drop zones using event handlers:

<!DOCTYPE html>
<html lang="en">
<head>
<meta charset="UTF-8">
<title>Drop Zone Example</title>
<style>
    .dropzone {
        width: 300px;
        height: 200px;
        padding: 10px;
        border: 2px dashed #000;
        margin-top: 20px;
    }
</style>
</head>
<body>
<p draggable="true" id="drag3">Drag me to the drop zone at how2html.com!</p>
<div class="dropzone" ondragover="allowDrop(event)" ondrop="drop(event)"></div>
<script>
    function allowDrop(event) {
        event.preventDefault();
    }
    function drop(event) {
        event.preventDefault();
        var data = event.dataTransfer.getData('text');
        event.target.appendChild(document.getElementById(data));
    }
</script>
</body>
</html>

Output:

Create a Draggable Paragraph in HTML5

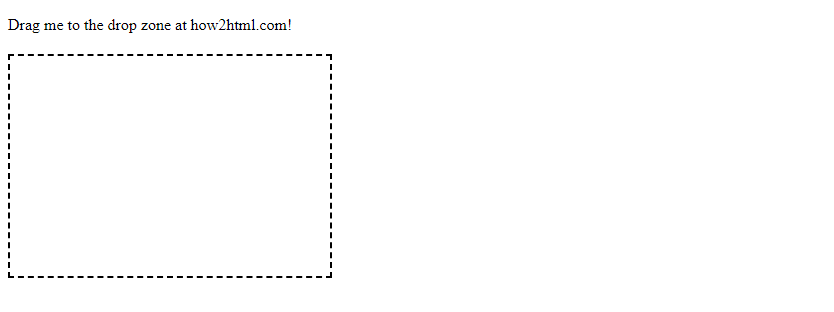
In this example, a div element is designated as a drop zone. The ondragover event is handled to allow the drop by calling event.preventDefault(). The ondrop event is used to append the dragged element to the drop zone.

Enhancing Functionality with JavaScript

While the HTML5 drag-and-drop API provides basic functionality, you can use JavaScript to add more complex behaviors, such as constraints on movement, snapping to a grid, or dynamically changing styles.

Example 4: Snapping to a Grid

You can make a draggable element snap to a grid as it is moved:

<!DOCTYPE html>
<html lang="en">
<head>
<meta charset="UTF-8">
<title>Grid Snap Example</title>
<style>
    p {
        width: 100px;
        padding: 10px;
        border: 1px solid #000;
        background-color: #f4f4f4;
        position: absolute;
    }
</style>
</head>
<body>
<p draggable="true" id="drag4" ondrag="snapToGrid(event)">Visit how2html.com for tutorials!</p>
<script>
    function snapToGrid(event) {
        var grid = 50;
        event.target.style.left = Math.round(event.clientX / grid) * grid + 'px';
        event.target.style.top = Math.round(event.clientY / grid) * grid + 'px';
    }
</script>
</body>
</html>

This example uses the ondrag event to adjust the position of the paragraph so that it snaps to a 50-pixel grid. The position is calculated based on the cursor’s coordinates.

Example 5: Dynamic Style Changes

You can dynamically change the style of a draggable element based on its position:

<!DOCTYPE html>
<html lang="en">
<head>
<meta charset="UTF-8">
<title>Dynamic Style Example</title>
<style>
    p {
        width: 150px;
        padding: 10px;
        border: 1px solid #000;
        background-color: #f4f4f4;
        position: absolute;
    }
</style>
</head>
<body>
<p draggable="true" id="drag5" ondrag="changeStyle(event)">Check how2html.com for more!</p>
<script>
    function changeStyle(event) {
        var x = event.clientX;
        var y = event.clientY;
        var element = event.target;
        element.style.backgroundColor = x > 500 ? '#ffcccc' : '#ccffcc';
        element.style.borderColor = y < 200 ? '#0000ff' : '#ff0000';
    }
</script>
</body>
</html>

In this example, the background color of the paragraph changes based on the x-coordinate, and the border color changes based on the y-coordinate. This provides visual feedback to the user about the position of the element.

Conclusion

HTML5 drag-and-drop functionality offers a straightforward way to implement draggable elements on your web pages. By combining the native HTML5 API with JavaScript, you can create highly interactive and dynamic user interfaces. The examples provided in this article demonstrate various ways to enhance the basic functionality, including custom drag images, drop zones, grid snapping, and dynamic style changes. For more detailed tutorials and examples, visit how2html.com.

Like(0)

HTML Articles